Before: A Galley Kitchen Doing Its Best.
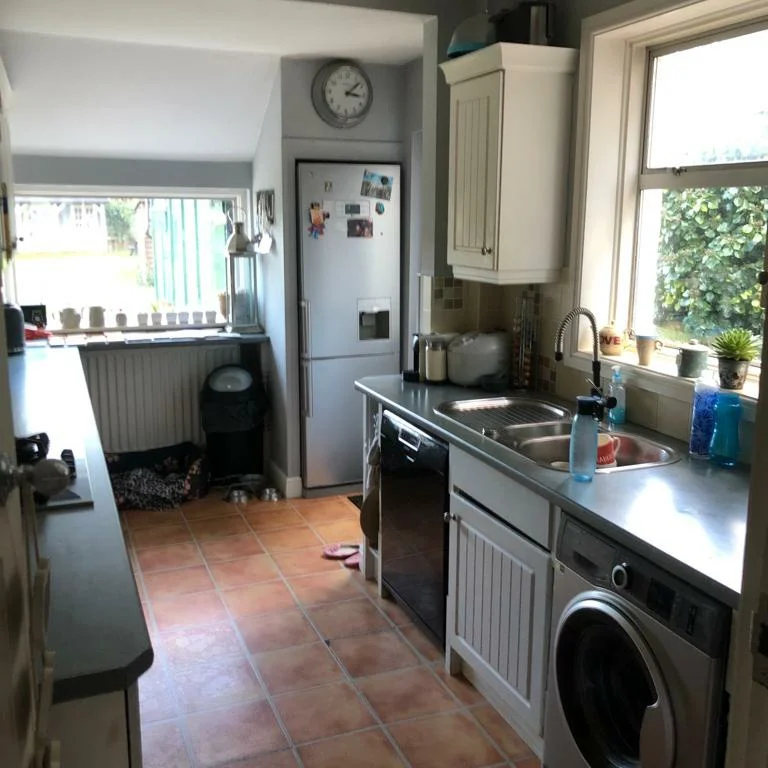
Every home has that one room that tries hard but never quite shines. For us, it was the kitchen — a small and narrow galley with plastic terracotta tiles, mismatched appliances, cloudy single-pane aluminium windows that let in more draught than daylight and a general sense of scrappy disorganisation and scuffed edges.
At the time this ‘before’ photo was taken, we had three children under five so home improvements ranked somewhere below “keep everyone fed and alive” on the to‑do list. If the house and the children were clean, I considered it a win. Meanwhile, the undersink cabinet door fell off so often that fixing it became a household hobby — a gentle reminder that the kitchen was long overdue for some attention.
The Slow Realisation
It took a while for the frustrations to accumulate and for us to realise that the kitchen we had been making do with for years wasn’t keeping up with us anymore.
I do remember the moment when I looked at those chipped, plastic terracotta-effect tiles and thought, “I can’t do another winter with you.”
We had a growing awareness that, as the boys grew bigger, we would need much more space. The eldest was still sleeping in the smallest ‘box’ room and, being the only female in a house with four boys, I knew all too well the perils of sharing one very small family bathroom. It was becoming clear that the house needed to work harder for us — and that meant looking beyond just the kitchen.
The messy middle
Before the demolition began, there were plans to draw, approvals to get and a builder to find. Thankfully, one of us had a bit of architectural experience and handled the drawings, which saved us money but not time.
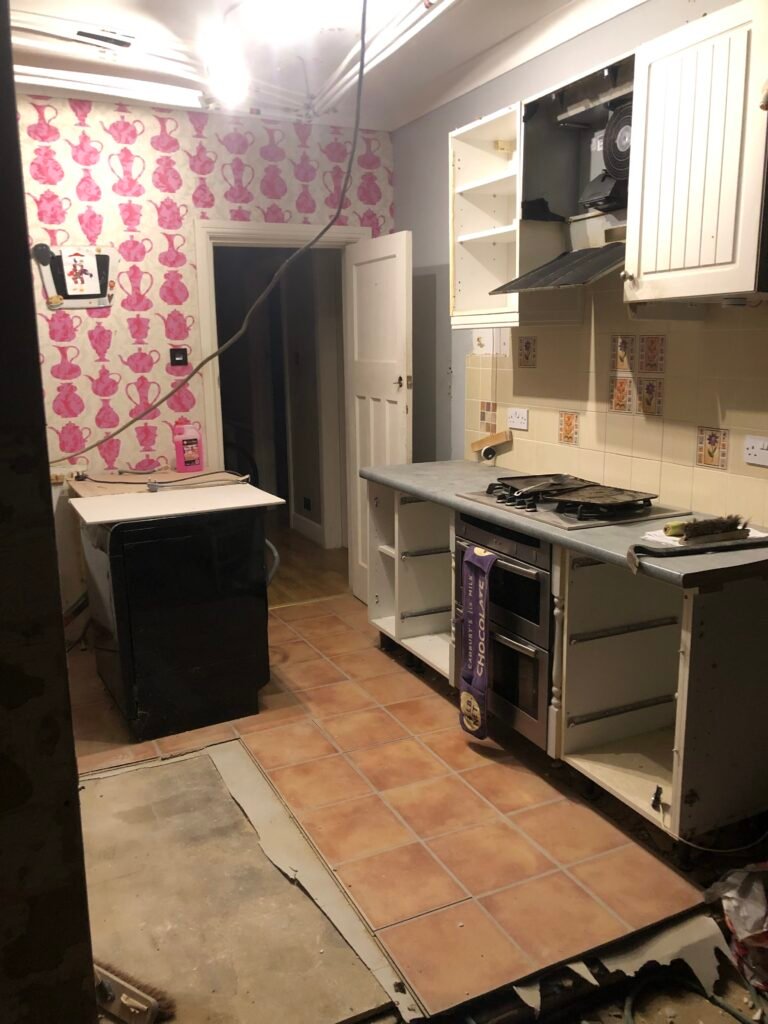
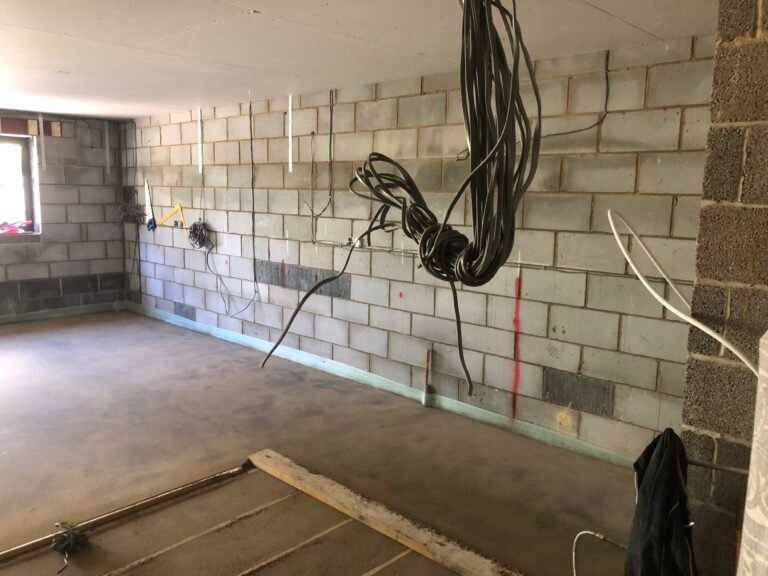
The refurbishment itself was the usual messy mix of excitement, dust, decisions and the kind of chaos where you temporarily lose the kettle and then a wall or two and begin to really start to question your life choices.
Cabinets came off the walls, tiles came up… and for a brief but memorable period the oven sat in the middle of the room, slightly judging us. Meanwhile, the fridge spent the rest of the build in the hallway and we all pretended that was absolutely fine.
However, as the walls started to come down, we could suddenly see past the chaos. It was still a building site, but for the first time it felt like a building site with potential and we started to believe that joining all of these smaller and disjointed spaces could actually work.
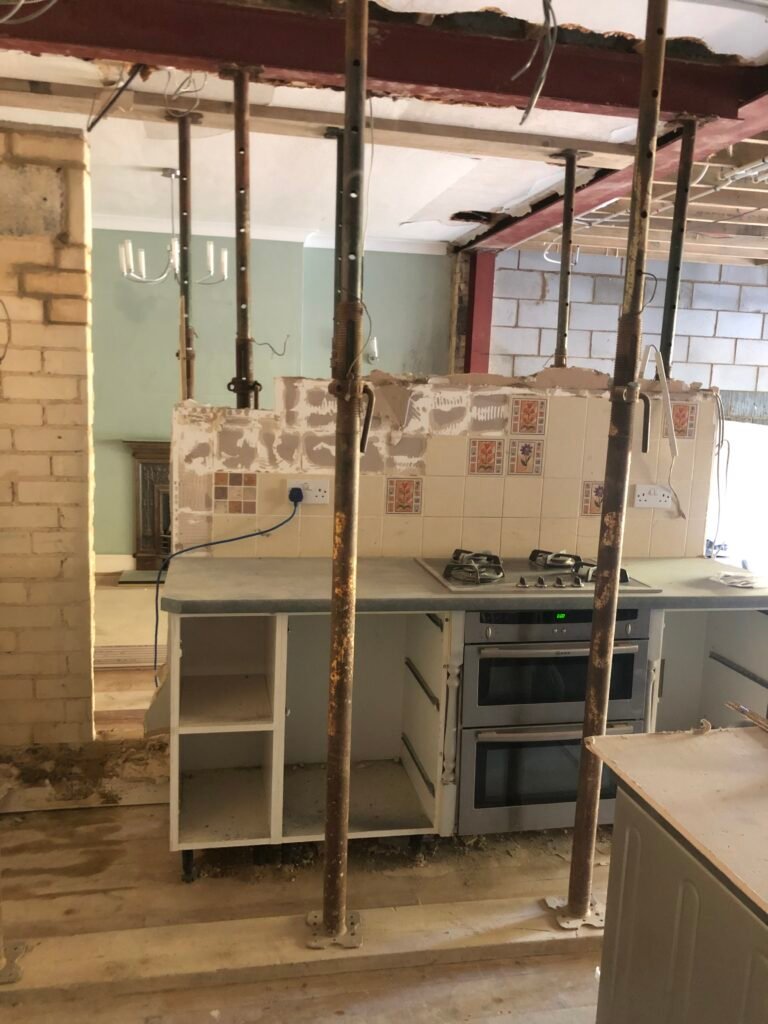
Taking Shape
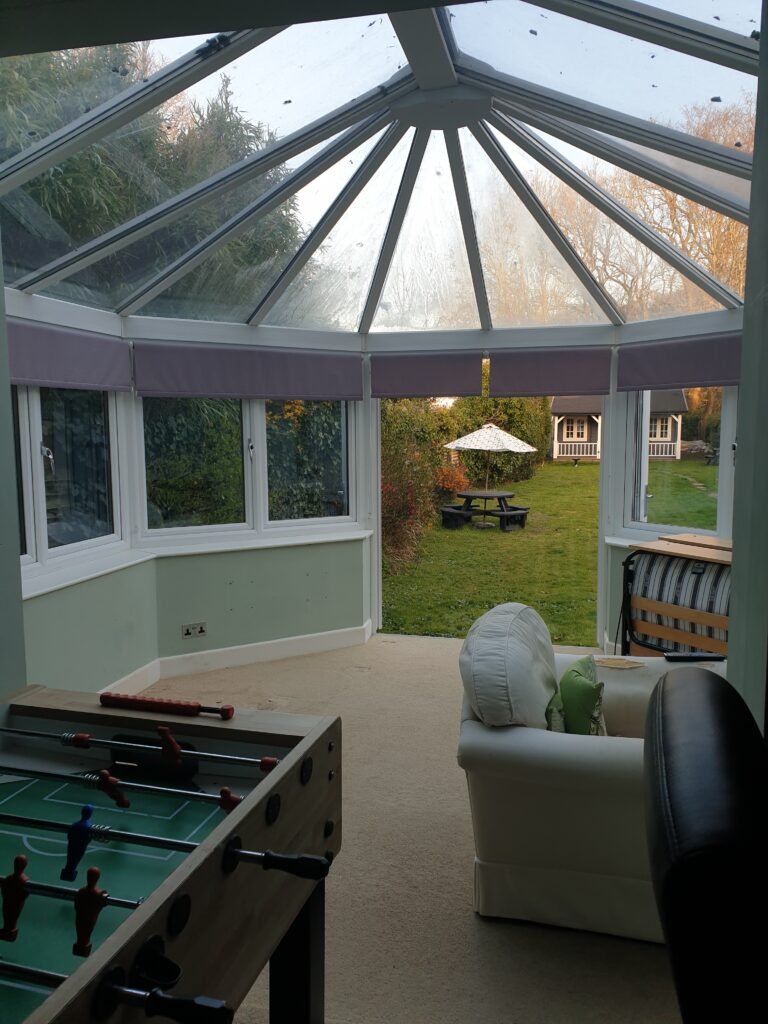
This was the stage where everything felt both messy and hopeful. Before anything new could go in, we had to make one big decision: the conservatory had to come down. It was the first — and only — thing we had added to the house when we moved in, a cost‑effective way to create a playroom off the dining room for the boys. But, for anyone who’s ever lived with a glass‑roofed conservatory, it is freezing in winter, an oven in summer ….. and almost never the room you want it to be.
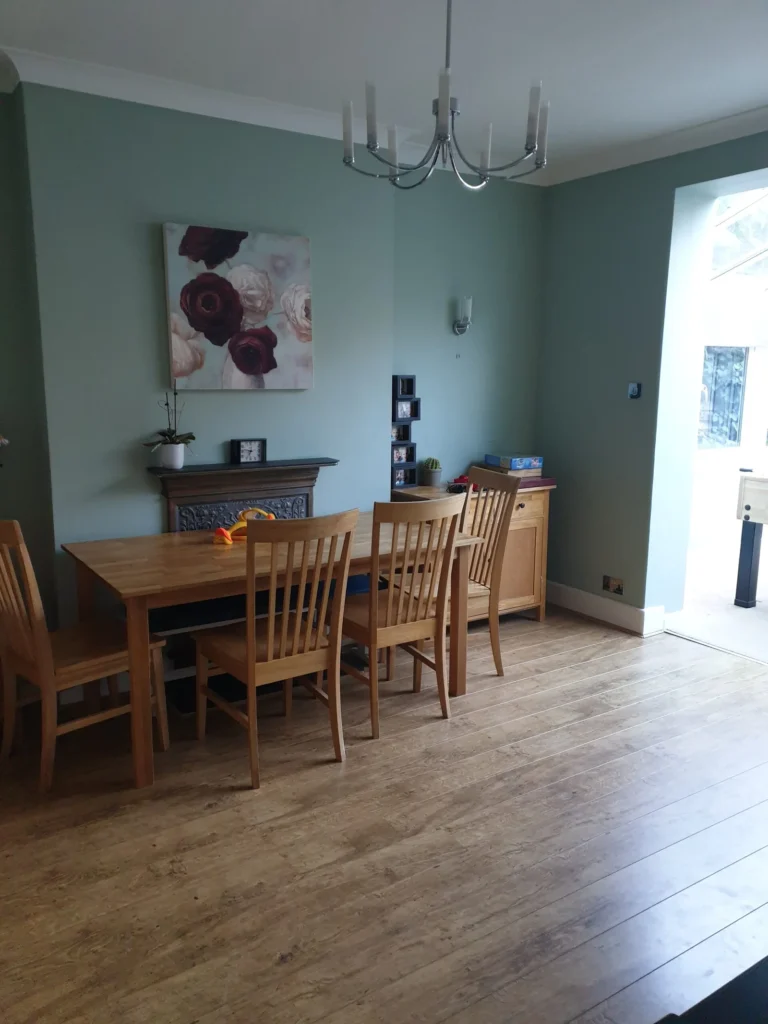
Taking it down felt strangely emotional — like undoing the first thing we’d done to make the house ours — but it was the only way to open up the space properly. However, once we committed to that, the rest followed: walls between the kitchen and dining room needed to go too, so the whole area could finally work as one.
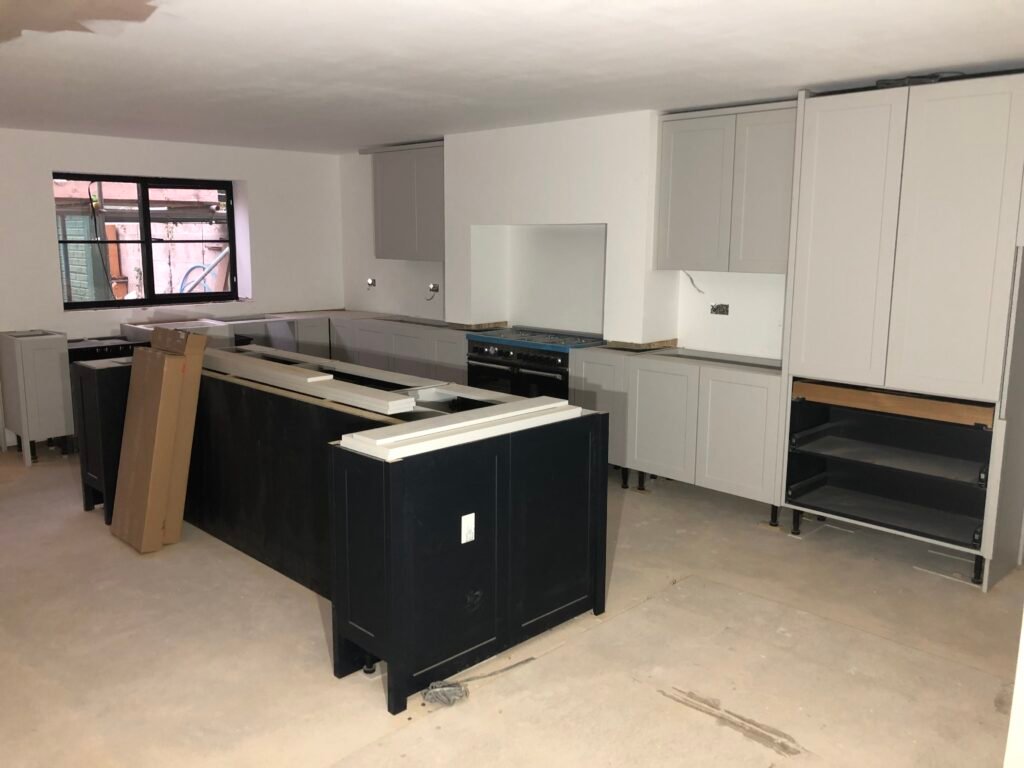
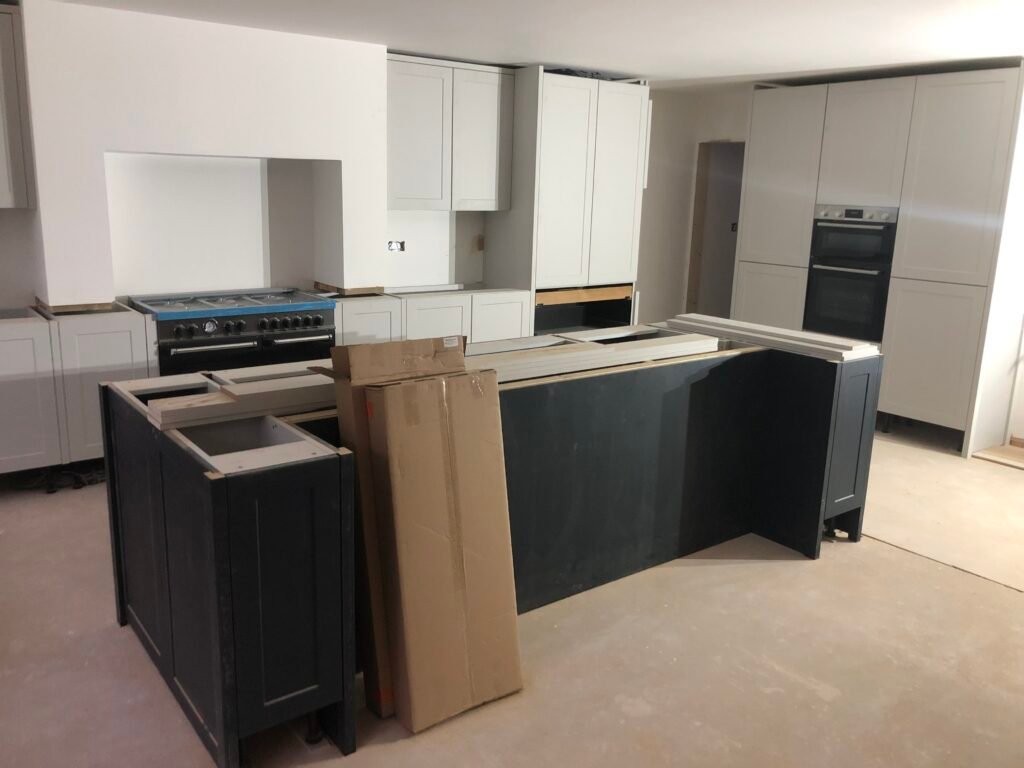
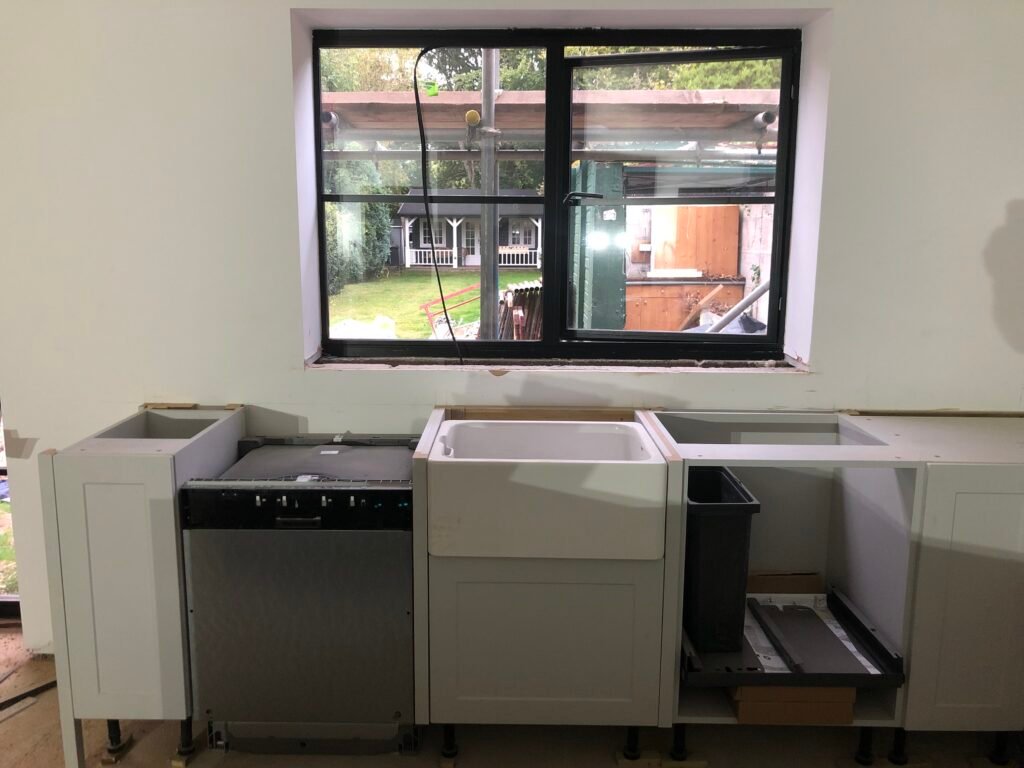
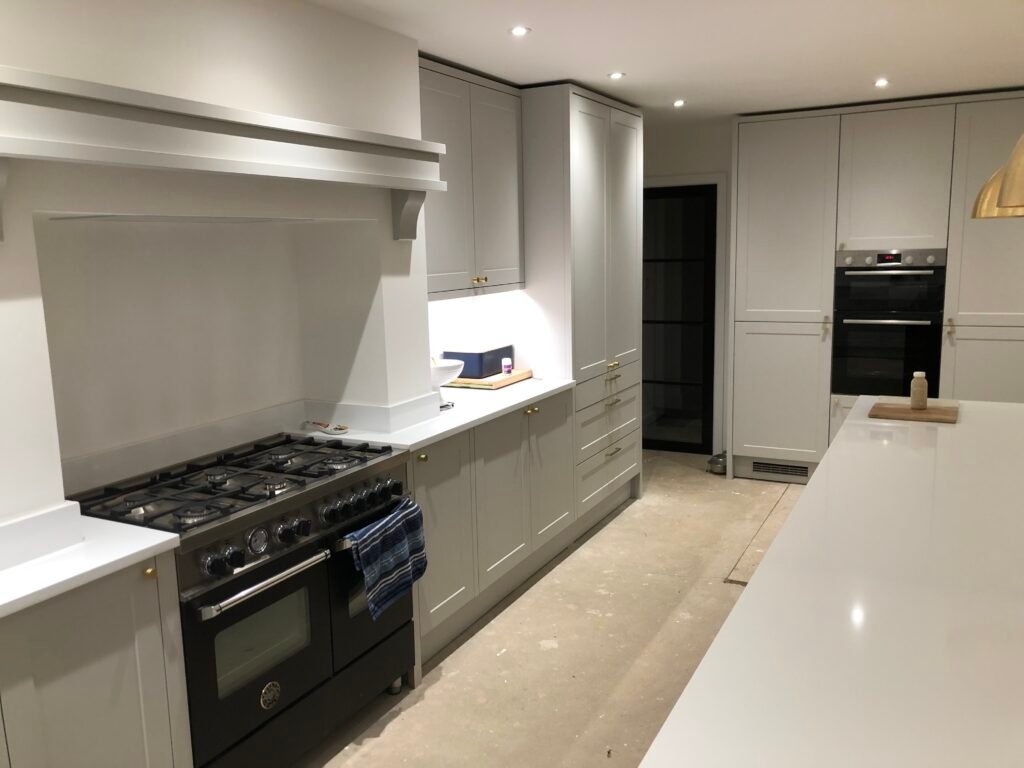
From there, the room slowly shifted from “building site” to “something we might actually live in.” The flooring was levelled and underfloor heating went in. The cabinets followed, and the new layout began to make sense. It was still rough around the edges, but for the first time, we could see the kitchen we’d been imagining taking shape right in front of us.


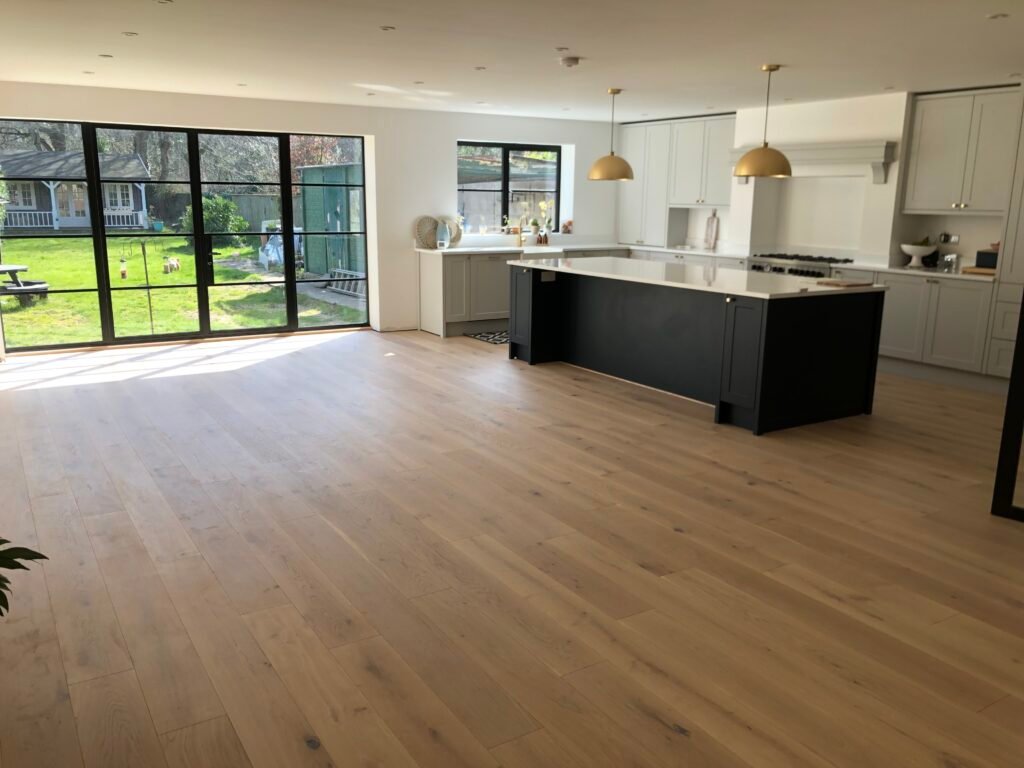
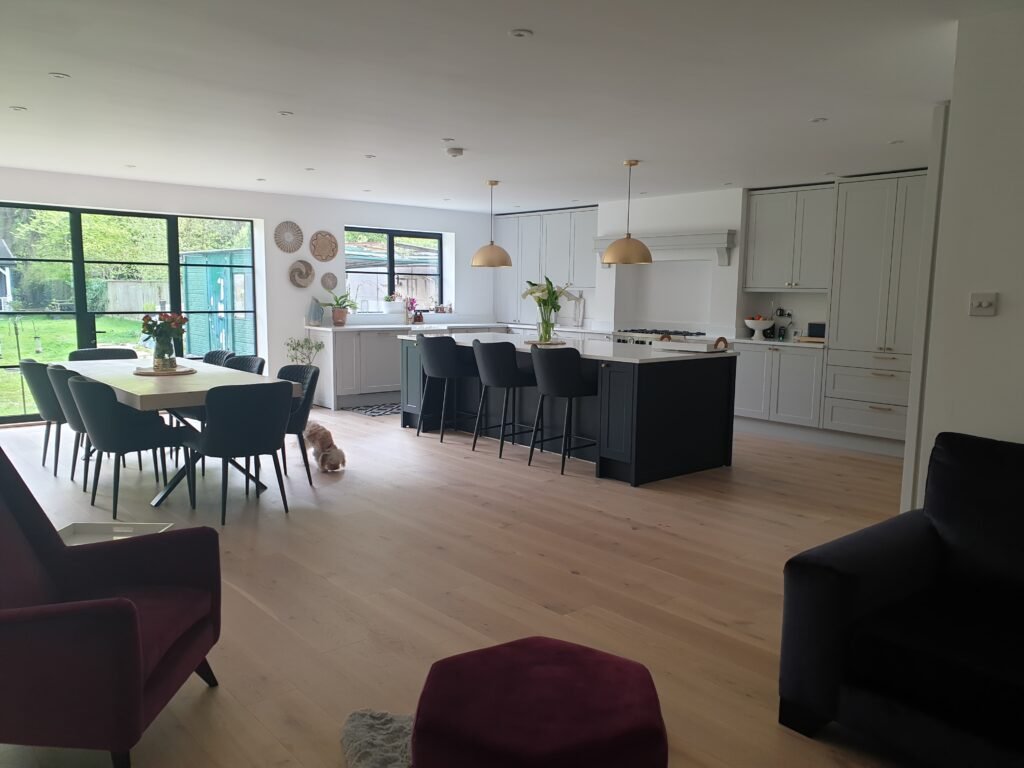
As the dust settled (temporarily) and the last of the walls came down, we could finally stand back and see the whole space as one. The kitchen, dining room and the area where the conservatory once clung on were suddenly connected in a way they had never been before. The new footprint felt balanced and open, and for the first time we could walk through it and imagine how life might actually work here. There was a moment — standing in what used to be three separate rooms — when we suddenly saw it: the light, the flow, the space. It finally made sense.
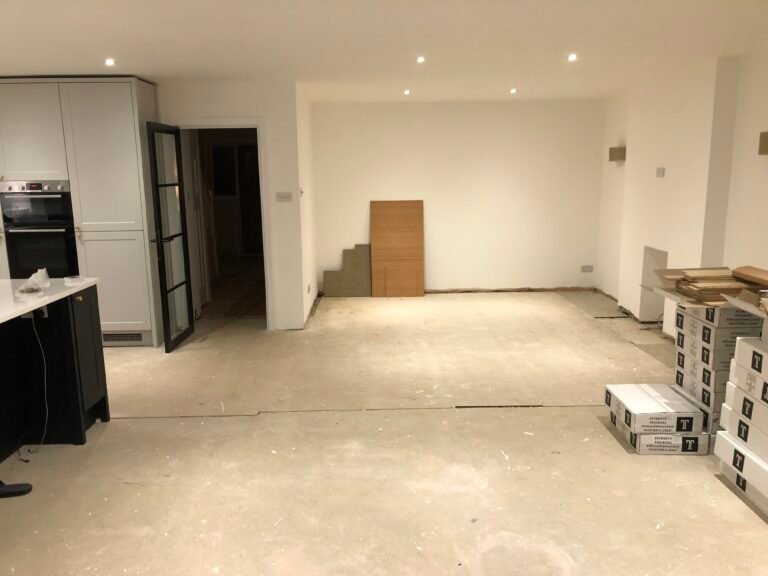
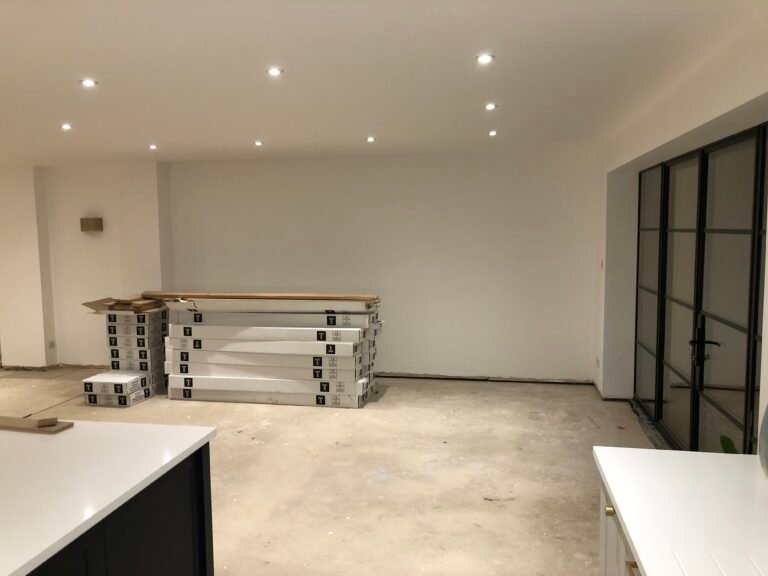
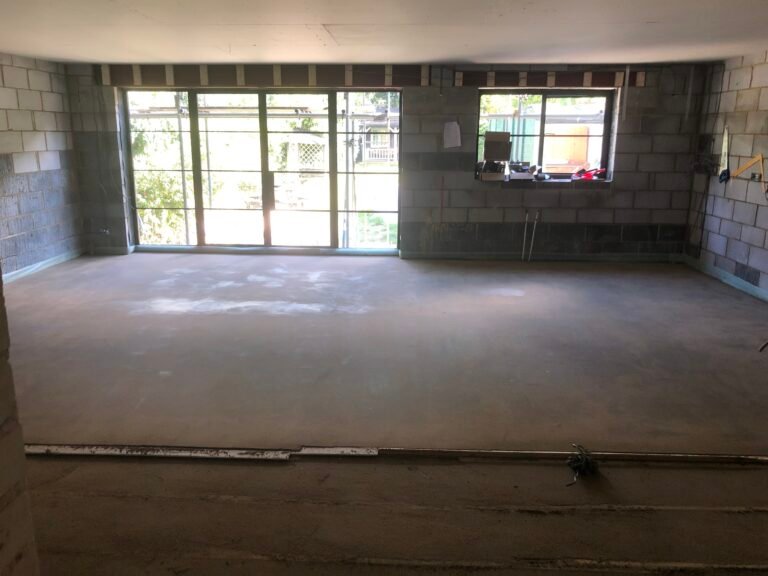
Design Decisions
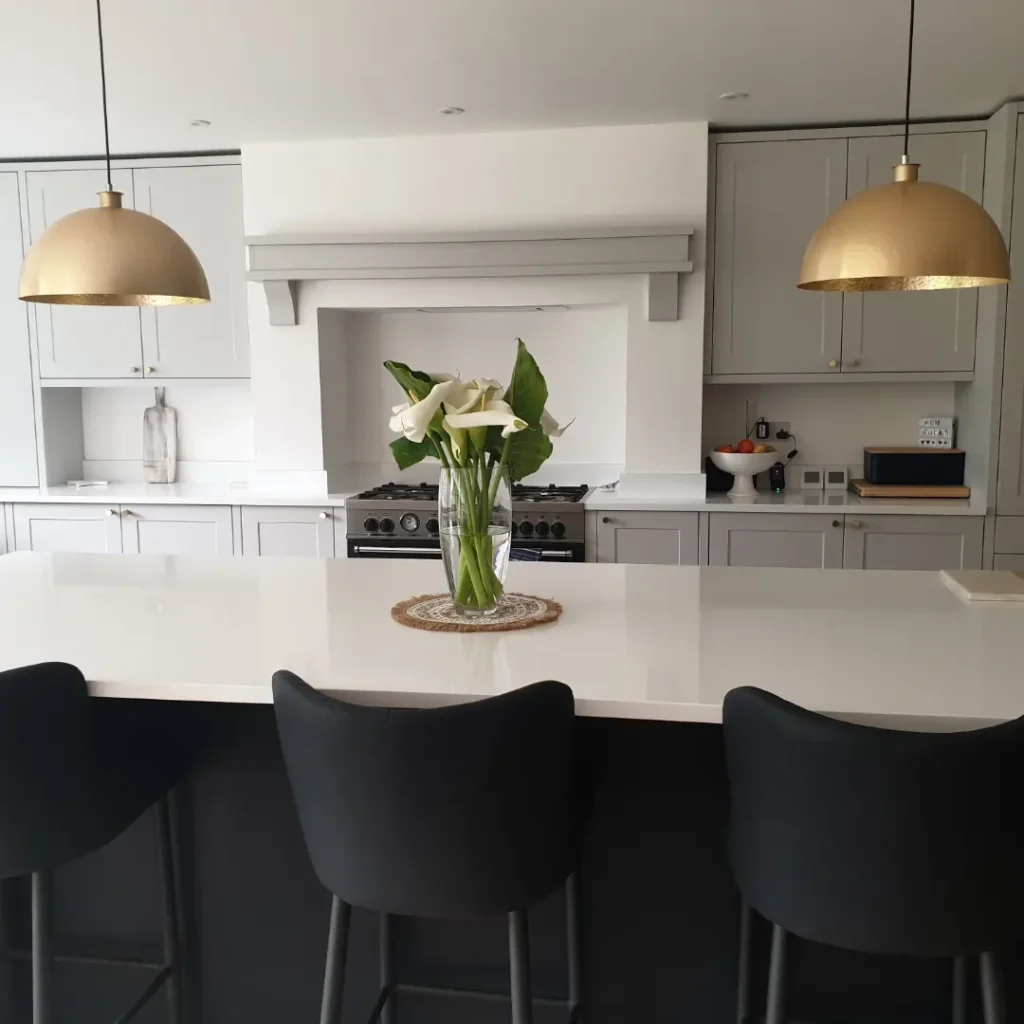
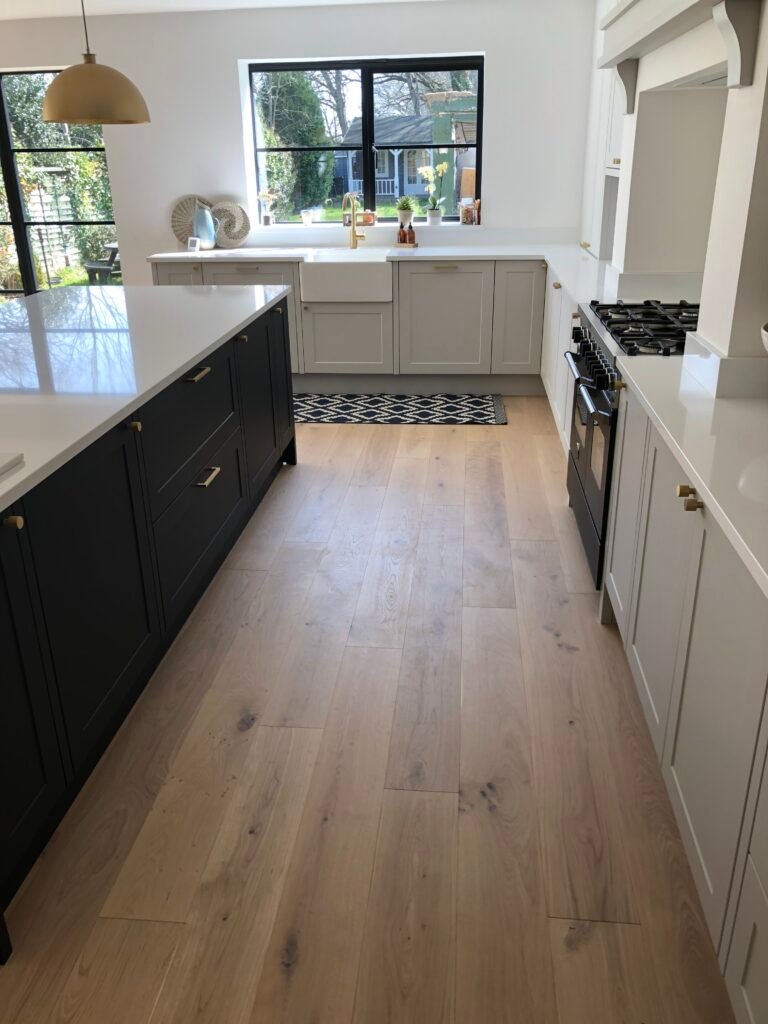
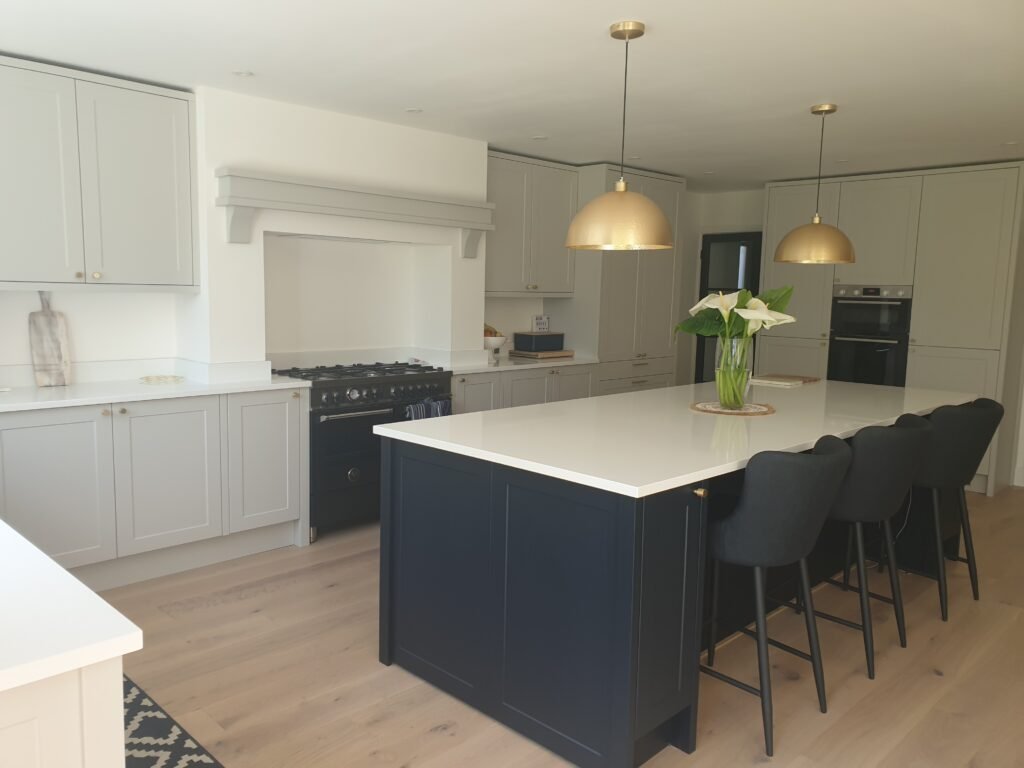
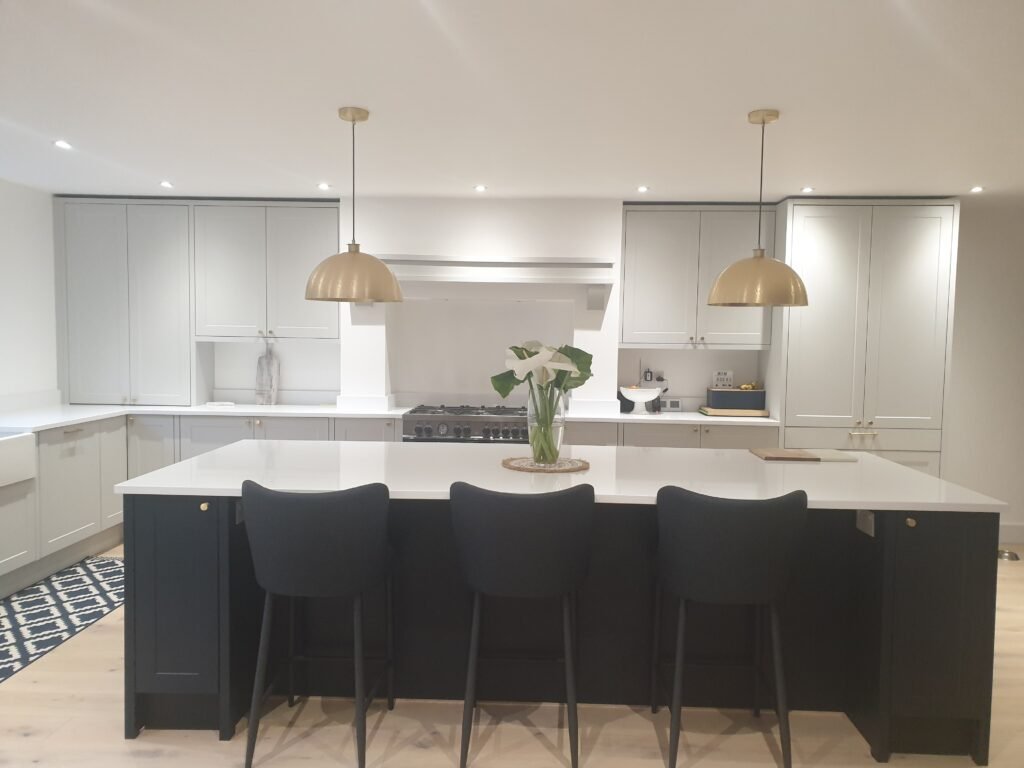
Once the layout was set, the rest of the decisions came down to how we wanted the kitchen to work for everyday family life. We knew we wanted something calm and simple, but with enough warmth that it didn’t feel too modern or too traditional. That’s how we ended up with the navy base units and light grey uppers — the navy grounds the room, while the grey keeps it feeling bright and open. It’s a combination that sits right in the middle of our style and still feels right every time we walk in.
Once the space was finally taking shape, the rest of the decisions came down to the small details that would make the kitchen feel warm and practical. We chose gold handles early on — they added a soft warmth and tied in with the lighting without overwhelming the room. We also had our eye on a boiling‑water tap (one of those “fancy but genuinely useful” upgrades), but the budget didn’t stretch to it this time. It’s firmly on the “one day” list.
Beyond that, our choices were guided by one simple question: will this make the kitchen easier to live in? If the answer was yes, it stayed. If not, it didn’t make the cut. Nothing too precious, nothing too trendy — just decisions that made sense for a busy family kitchen.
The reveal
Seeing it all together — the colours, the layout and the details we’d talked about endlessly — was the moment it finally felt like home. What surprised me most wasn’t the new cupboards or the shiny surfaces, but how different the room felt. Suddenly we weren’t dodging dog bowls or doing that sideways shuffle past each other. The kitchen stopped being something we worked around and started being somewhere we actually wanted to be.
Sources & Finishes
Here’s a breakdown of the colours, materials and finishes we chose — the things people always ask about once they see the kitchen in real life.
-
Cabinet colours — Navy base units and light grey upper cabinets
-
Cabinet style — Mock in-frame shaker‑style doors with a simple, clean profile
-
Handles — Brushed gold handles (warm without being too shiny)
-
Worktops — White quartz
-
Splashback — Simple, clean finish
-
Lighting — Gold pendant lights over the island
-
Flooring — Hard‑wearing, warm‑toned flooring
-
Paint colours — Soft, neutral walls
-
Overmantle beam — Custom‑made to match the cabinetry
-
Cupboard interiors — Practical, easy‑clean finishes
Budget Breakdown
Renovating a kitchen comes with a lot of moving parts, so I have broken our budget into the main areas we spent money on.
Cabinetry & Appliances
-
Main kitchen cabinetry, grill wall oven, fridge and freezer — £11,000
-
Utility room cabinetry — £1,800
-
Italian Bertorelli cooker — £2,400
Labour
-
Kitchen installation labour — £3,500
Flooring
-
Flooring supplied by Todd’s flooring and this included installation by a local tradesperson and included the hallway, (which we did in a pricier Herringbone style) — £6,500
Plumbing & Electrics
Plumbing and electrical work were part of a larger whole‑house renovation, so we don’t have a separate breakdown for the kitchen alone.
Other Costs
(These were either included in the main packages or we don’t have individual figures.)
-
Quartz Worktops – £4,000
-
Lighting – part of lighting costs for entire build, so difficult to quantify.
-
Painting & decorating – just the cost of the paint, as we did it ourselves.
-
Structural work – wall removal was all part of the main build cost.
-
Porcelain Butler Sink – £250 (as part of the kitchen package – we chose the cheapest)
-
Tap – Ikea £50
-
Extractor hood – £180 (as part of the kitchen package)
-
Windows & Doors – Crittal style from a local supplier – £12,000 (this also included changing out the top fan lights from our stained glass windows at the front of the house, which were very 80’s!).
Total Known Costs
£25,630 (not including plumbing/electrics/windows or any items included within the whole‑project cost).
We made a few deliberate choices to keep the costs under control — like choosing just one oak‑lined drawer instead of all of them, and saving the boiling‑water tap for another day. On the other hand, we spent more on the quartz worktops and the custom overmantle beam because they made the biggest difference to the overall look.
What I would tell anyone thinking of doing the same
Renovating a kitchen is one of those projects that looks simple on paper and then somehow takes over your entire life. Looking back, there are a few things I’m really glad we did — and a few things I’d tell anyone else to think about before they start.
If you are thinking of doing a renovation like this, the biggest thing I would say is: be realistic, but don’t let the total cost scare you out of doing something you will love. I was genuinely surprised when we added everything up — and that’s before the M&S navy velvet sofa for the corner, or the new dining table, rugs and side tables. The truth is, you don’t have to buy everything at once. We added things slowly, as we could afford them, and it made the whole process feel manageable. If we had sat down at the very beginning and tried to cost out every single detail, we probably would have talked ourselves out of it. Instead, we focused on the big decisions first, and let the rest build over time. It’s a marathon, not a sprint – and that’s completely okay.
-
Plan your storage early Think about where the kettle, toaster and mugs will actually live. Designing the coffee cupboard and “almost‑a‑pantry” early saved us from cluttered worktops.
-
Be honest about your budget Choosing just one oak‑lined drawer saved more than we expected. Decide where to splurge and where to compromise.
-
Work with people who listen Our small, local kitchen company made the whole process easier because they understood what we wanted.
-
Think about how you move in the space The biggest change wasn’t the shiny surfaces — it was not having to do the sideways shuffle past each other.
-
Choose finishes you won’t get tired of Calm colours and simple lines feel timeless.
-
Accept that you won’t get everything at once The boiling‑water tap didn’t make the budget this time — and that’s fine.
If you are about to start your own renovation, the best advice I can give is this: design for the life you actually live, not the one you think you should be living.
Would I do it again?
The kitchen is done. The crumbs are contained…. so, I am calling that a win.
And now that it’s finished, I can finally say it: I would do it all again. Maybe not tomorrow… but one day.
